We all like to be able to be self sufficient and there is nothing like kitting out your own tack room, feed room or tie-up area with custom hooks and shelves that are just right for your system of tacking up, feed storage or bridle hanging.
Not everyone has a welder, or welding skills (my favourite past-time!) and the good news is that you don’t need one either! The friendly cordless drill, some screws, and some creativity can give you everything you need. So here is an equestrian friendly cordless drill user manual…
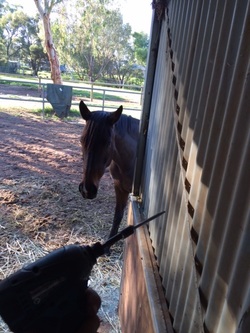
Firstly, in order to be equestrian friendly we have to first remove the horses from near-by before embarking on our drilling adventures. It’s likely that you’ll make the drill make all sorts of funny noises, the sort that horses don’t like much and will send them running for their lives, so don’t try adjusting that hook or shelf in the tie-up bay with them tied next to you!
Secondly, it’s important to know which screws you need for each purpose, and what sort of surface you can and can’t screw in to. A lot of this can be worked out by trial and error but sometimes that means messy holes in walls that ideally shouldn’t have been touched!

You want to make sure there is a good purchase for your screw to hold to – for instance screwing in to corrugated iron isn’t very secure because it’s really thin (though works if you add a little liquid nails – the second most useful invention after bailing twine - to the equation!). So try to choose a spot where you can screw in to wood, or a more solid piece of metal like an upright column or horizontal support.
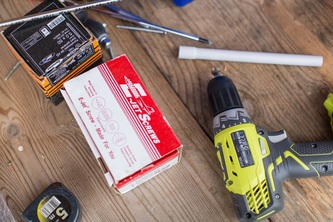
If you’re screwing in to metal, you’ll need a certain type of screw, with a different tip, to that which you’ll need for wood. See the pics to spot the difference. But they are usually well labeled at Bunnings as either wood or metal screws. Next, you’ll need to work out what length you need, and what type of drill bit to screw it in with – there are countless types, but if you match the head of the screw with the drill piece you have (or buy) then really it’s just like playing those put-the-shape-in-the-hole games that you played when you were two years old.
There are several settings on the drill that appear to be a case of secret men’s business but you’ve got a few options for finding out what each one does…
1. Firstly, you could try finding the instruction manual and having a read. Seems boring, and it’s unlikely that the instruction manual will still be in existence, let alone somewhere you’re likely to find it.
2. Your second option is to try googling the type of drill and see what comes up. There are youtube tutorials for pretty much everything these days and I am sure drilling is one of them!
3. Your third option, and my preferred one, is to get yourself a piece of scrap wood, some screws or a drill bit, and go through all the options on the drill and see if you can work out which is which and what setting you want!
There will likely be a bit switch that gives you the option of 1, or 2. Sounds simple huh? This changes the speed of the drill, which in turn changes the torque. It’s like changing down a gear in the car – you’ll go slower, but have more power to pull the float up the hill. This setting is really useful if you want to prolong your drill’s life, and get through tough materials. We use the slow setting for drilling large holes (above about 9mm) in metal, or screwing long screws in to wooden posts. You’ll get less heat built up and do less damage to your drill bit, plus it’s much less strain on your drill.
Some have the option of being a hammer drill, or not, and some will have different settings for strength – the point at which is either stops drilling, or rotates in your hand and really hurts your wrist. So have a fiddle around, and if in doubt go slower not faster because it really hurts when the drill takes over and twists your arm – trust me, even those of us with really fast reflexes never let go before it’s done some minor (but painful) damage to your hand!
So with all of that in mind, away you go to create your perfect, personalized, picture-clad tack room. And remember – if the drill stops working it is probably the battery. Failing that, if you borrowed it from dad/brother/husband/friend, carefully place it back in the shed exactly where it was and pretend nothing ever happened……..

 RSS Feed
