Sushi is one of those things that can tend to divide people. It’s fishy, and even if it’s not fishy (in the case of vegetarian or chicken filled sushi), the seaweed wrapping has its very own fishy taste. While we quite like our vegan sushi (especially when doused in enough pickled ginger and soy sauce!) but we’ve also found a way around the fishy taste for those days when we’re in a not-so fishy mood.
Sushi essentials:
Sushi rice – it’s nice and sticky. We have made sushi with our favourite brown basimati rice in the past and it works, it just won’t made quite as firm a roll.
Sushi seasoning – for seasoning the rice. If you can’t get any you can just dissolve a little sugar in hot water and add some vinegar and salt.
Soy sauce – gluten free in our case.
Pickled ginger – it just isn’t sushi without pickled ginger!
Wasabi – again, it’s not sushi without some wasabi.
Yaki Nori, or for our not-so-fishy (and not-so-authentic) sushi, vietnamese rice paper.

Sushi rice is dead easy to cook in the rice cooker and as soon as it is done we sprinkle over the sushi seasoning – you can put a little in at a time, stirring and tasting until you get the desired ratio. It will depend on your taste and how much rice you use but you’ll get used to working out the best amount for you.
While you wait for the rice to cool enough to handle you can prepare the rest of the sushi fillings. We usually make a mixture out of grated carrot, vegan mayo and mashed avocado for the filling, and then slice pieces of cucumber and sometimes fried tofu to add as well.
Once the rice has cooled enough to handle you can start making your rolls. You don’t need fancy sushi equipment. Just your bench will do.
For proper sushi, lay out the yaki nori shiny side down and fill half of it with a layer of rice, about 1cm thick. I like to squish the rice down a bit to make the roll firm. Wet your hands to save ending up with rice mits. Then layer a little of your avo and carrot mix in down the middle of the rice, followed by whatever veggies you’ve chosen, and roll. Make sure you tighten it as you roll, squeezing it together a bit. You’ll find some brands of yaki nori easier to use and others break up more. The trick is to work quite quickly – you want to have it rolled before the rice has had time to moisten the yaki nori. Then sit your roll aside, seam side down, and work on the next. As they sit the rice will make the yaki nori soft and then they’re ready to be cut. If one of your rolls splits you can just wrap it in another sheet if you like – it’s a bit of a cheat but it saves waste (alternatively you can just take that roll as one for the chef!).
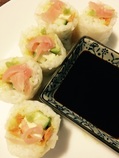
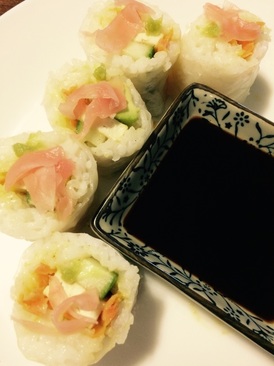
For our not-so-fishy and much less authentic take on sushi we use all the same ingredients but instead of using yaki nori we use Vietnamese rice paper. Dip the rice paper sheet in warm water for about 10 seconds (you want it stiffer than if you were making rice paper rolls) and lay it on your cutting board (or the bench if it’s clean!). Add in the ingredients as above and roll up in the same way. You’ll find they produce floppier feeling rolls, but they cut well and work just like sushi in the end.
To serve, cut them with a very sharp knife, you’ll get about 5 or 6 pieces of sushi per roll and serve with pickled ginger, wasabi and soy for dipping.

 RSS Feed
